FL Studio is a complete Digital Audio Workstation (DAW) with a large user community. It is sold for lower prices than many popular DAWs, offers an incremental upgrade path between its editions, and owners get free updates for life. Sometimes the free updates include new instrument and effects plugins. The trial version has no time limit, so users can evaluate for as long as they want before buying. The free trial version’s limitation is that it cannot reopen saved projects.
Step 1: Download FL Studio Trial
- Visit the Official Website: Go to FL Studio’s official download page.
- Download the Trial Version: Click on the “Download” button to get the FL Studio trial version.
Step 2: Install FL Studio
- Locate the Downloaded File: Find the installer in your Downloads folder.
- Run the Installer: Double-click the file and follow the installation prompts.
Step 3: Launch FL Studio and choose an edition
- Launch FL Studio: Find the icon in your dock, start menu, or Applications folder, and launch it.
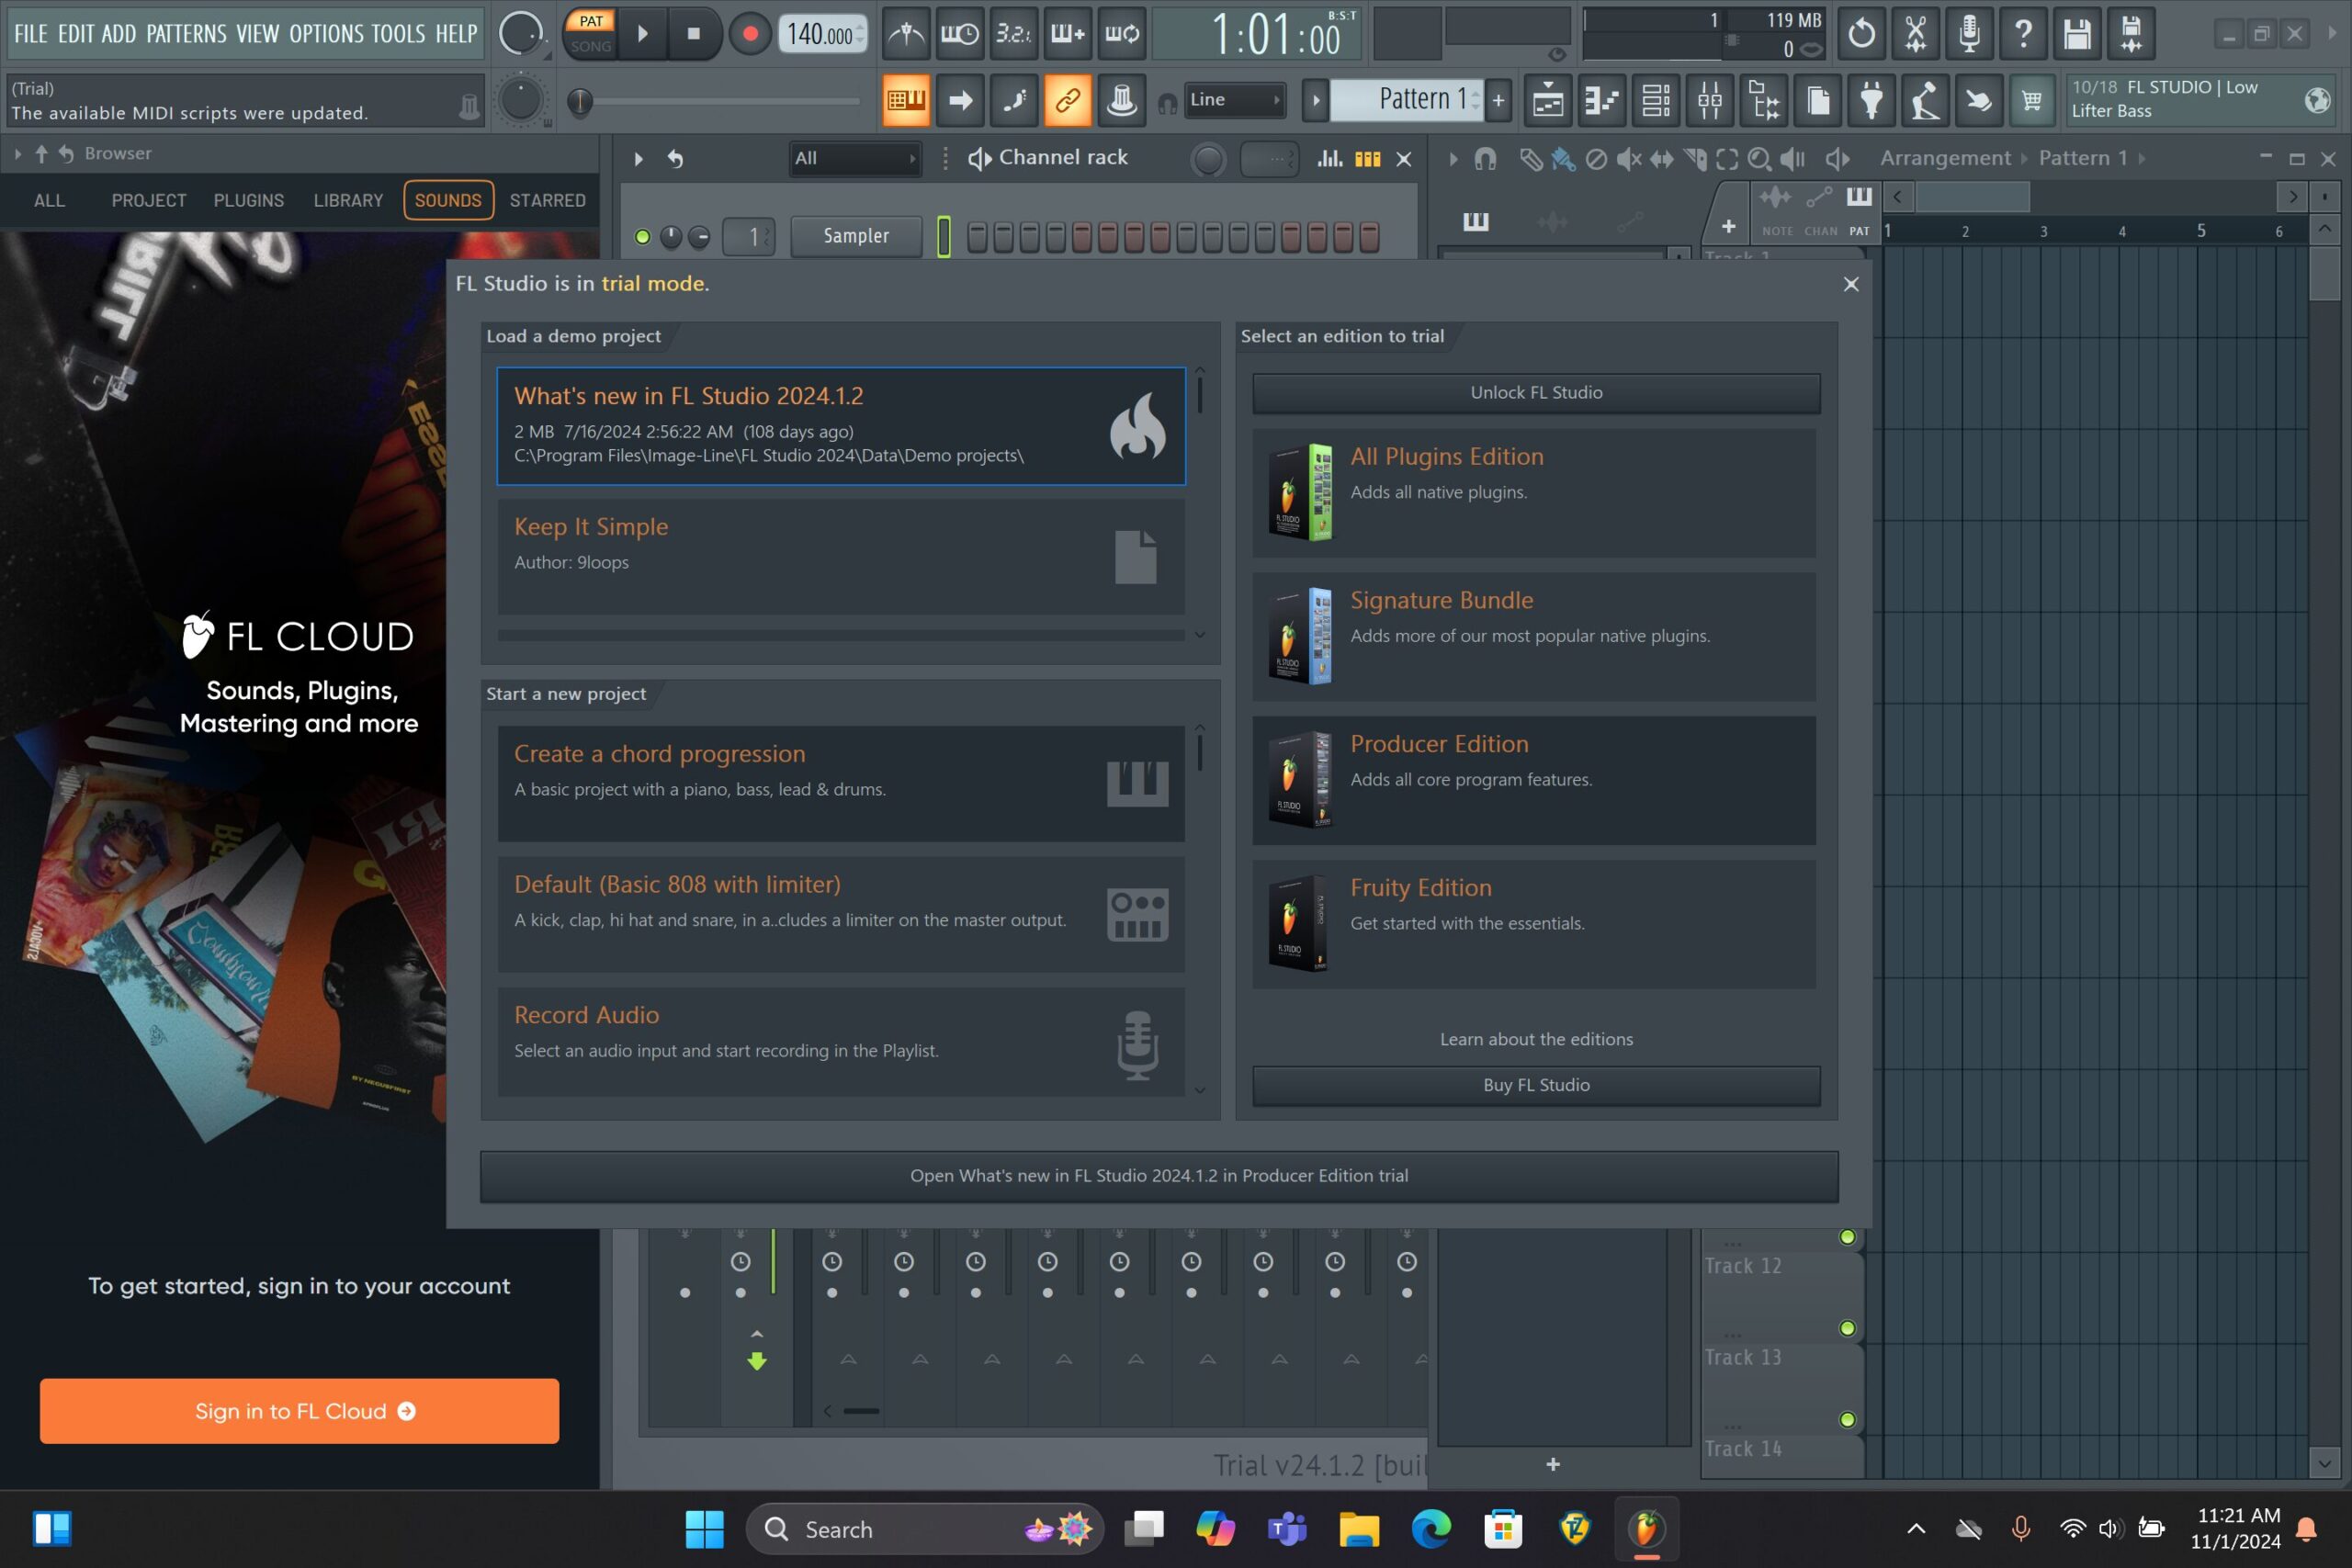 Choose an Edition: In the startup window, choose “Fruity Edition” to trial the most affordable edition of FL Studio; or select any edition you wish to try out.
- Choose a Template: In the startup window, in the bottom-left column, there is a list of templates to start the new project with. This article will use “Default (Basic 808 with Limiter)” but feel free to browse all the options before beginning. Keep in mind that some templates will use instruments and effects from the higher-priced editions.
 Get Acquainted with the Hint Panel and Top Bar Controls: First, observe the Hint Panel (shown above) on the far left of the Top Bar. This panel will show the names of controls as you hover your pointer over them. Give it a try! This guide will start with the buttons for controlling the major sections, along with the Pattern Selector (shown below), which appear to the center or right of the bar controls.
 Introduce Yourself to the Major Sections: First, hover your pointer over the menu and buttons shown above. Observe the names in the Hint Panel for each one. The menu at left is the “Pattern selector,” patterns are building blocks of a song, usually comprising 1 or more bars. They will contain notes you record or program in the Piano Roll. The 5 buttons show and hide the major sections of the FL Studio workflow, starting from left:
- Playlist: the arrangement of all Patterns and samples in your song.
- Piano Roll: this shows the notes played for a selected instrument Channel within the selected Pattern.
- Channel Rack: this shows the list of available instruments and sample sounds in your project. It also manages selection of Piano Rolls and step sequences for a selected Pattern.
- Mixer: a set of audio level controls that can be assigned at will to your loaded Channels/instruments/samples, and routed to one another, for mixing down a complete song.
Step 4: Get to Know the Channel Rack and Piano Roll
Channels represent the Instruments and Samples which generate sound in your project. While other things can be described as “channels” such as mixer tracks, the Channel Rack comprises the distinct origins of the sounds made in your project, and the notes played. Think of them like the physical instruments in the recording studio. As in the physical world, here you can have multiple copies of the same instrument to play different parts.
 Get to know the Channel Rack controls: Each Channel row contains the following controls, from left to right:
- Mute (circular green light button)
- Panning (knob)
- Channel volume (knob)
- Target Mixer Track (track number, or blank for Master)
- Channel button (rectangle with Channel’s name and color)
- Channel selector (narrow rectangle indicating which Channel is selected)
- Piano Roll Preview or Step Sequencer (buttons or wide rectangle indicating notes played)
- Add an Instrument Channel Using the Plus Button: Click and hold the + symbol at the bottom of the Channel Rack window. From the menu, under “Drum,” choose FPC.
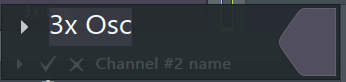
 Add an Instrument Channel using the Browser: Click the browser button in the tool bar, as shown above. Then, from the browser shown in the left hand column, make sure the sound wave icon (ALL) is selected, then click to expand Plugin database > Generators > Synth classic, as shown below. From that list, drag 3x Osc over to your Channel Rack.
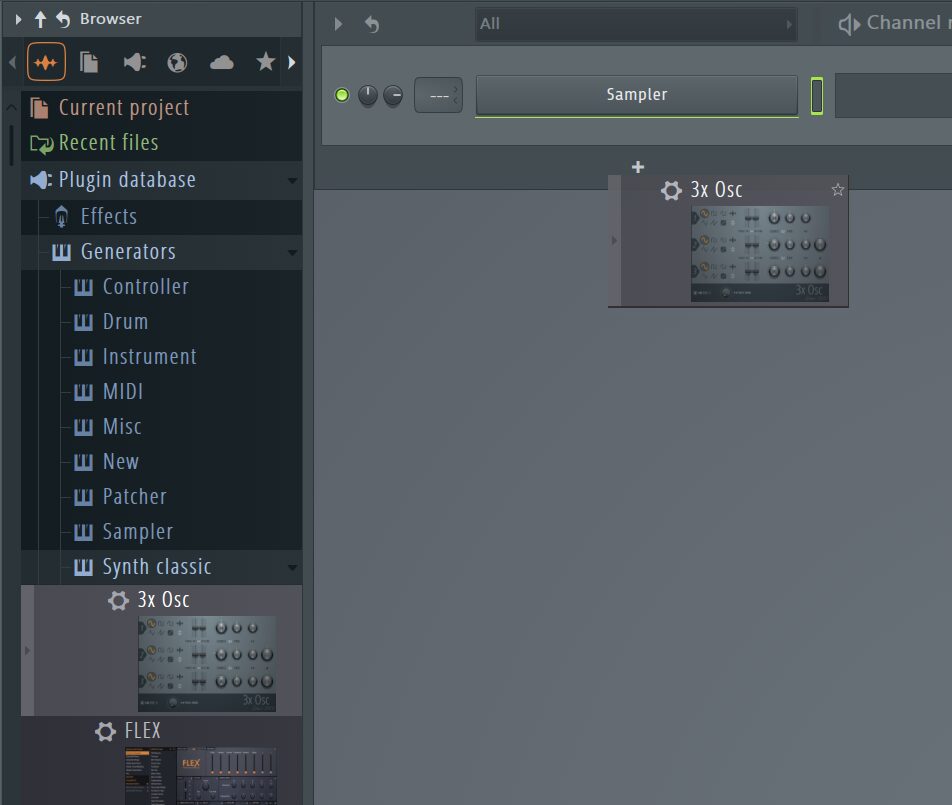
- Choose Colors for Channels:
 Right-click on any Channel name and select “Rename, color and icon…” which will open a small widget near where you clicked.
- On its right hand side, click the shape filled with color to open the color picker.
- Choose a color and click “Accept.” Click the check mark to close the widget.
- Repeat for as many Channels as you wish, or right-click on Channel names and select “Random Color.” The color selections will be useful later when linking Channels to the Mixer.
- Select the Active Channel to Play: Click on the narrow rectangle between a Channel’s button and its Piano Roll Preview, to make it the active channel. The active channel determines which channel will receive notes from keyboard controllers, and usually determines which Channel’s Piano Roll to edit when opened. For scenarios in which multiple Channels are selected at once, consult the manual.
Step 5: Try Out the Step Sequencer and Piano Roll
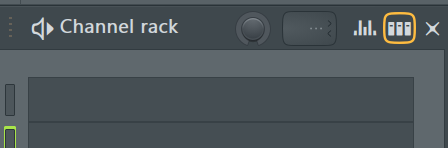 Toggle Between Step Sequencer and Piano Roll: Near the top right corner of the Channel Rack window, a button with 3 small rectangles will toggle between Step Sequencer view and Piano Roll Preview. The Step Sequencer is a row of 16 buttons, while the Piano Roll Preview is a flat gray rectangle with small shapes inside. Generally speaking, Step Sequencer is better suited for drums & percussion, while Piano Roll is better suited for melodic instruments, but you are free to use whatever suits your creative flow.
 Add and Remove Beats in Step Sequencer: Each Step Sequencer button represents a 16th note, so every group of 4 buttons (indicated by color) represents a whole beat. Clicking a button activates that note, and right-clicking deactivates it.
- On a kick drum such as “808 Kick,” clicking the first button in each color section creates a basic 4/4 beat.
- On a snare drum such as “808 Snare,” activating the first button in each red section creates a snare sound on every other beat, which should be familiar from most pop songs.
- Use the Play and Stop buttons in the Toolbar to preview the beat.
- Add and Remove Notes in Piano Roll: Switch the Channel Rack back to Piano Roll Preview.
- In the row for 3x Osc, click on its Piano Roll Preview, and it will open the full Piano Roll window.
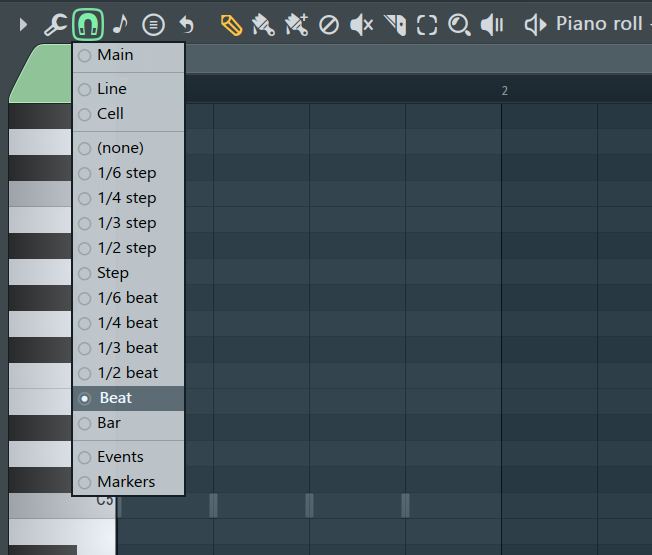 At the top of the Piano Roll window, you will see a series of tools. First, click and hold the Magnet icon, and select “Beat.” This will ensure your notes start on each beat, you can change this or turn it off later depending on your intentions.
- Also at the top of the Piano Roll window, select the Pencil icon.
- Along the left side of the window, you will see a vertical set of piano keys representing the notes you can program. You can click on these keys to preview the notes.
- Most of the window shows a grid representing numbered “bars” of music timing, each bar represents 4 beats, similar to the Step Sequencer.
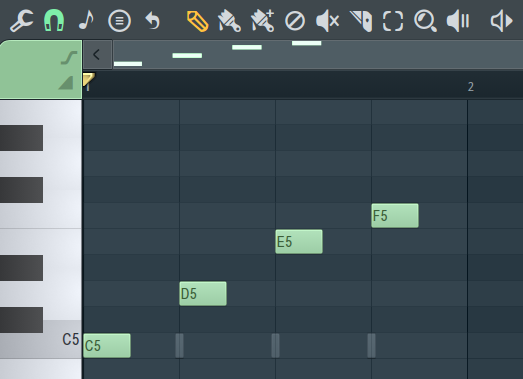 “Draw” some notes in the first grid section in Bar 1, similar to the image above.
- Use the Play and Stop buttons in the Toolbar to preview the melody with the beat.
- Try deleting some notes by right-clicking on them.
Step 6: Create 2 or More Patterns
- Duplicate Your Pattern: Go to the Pattern Selector, click the arrow button to show its menu, and choose “Clone Pattern.” Now you will have a “Pattern 2” shown in the Pattern Selector. This copied all the notes from Pattern 1, so you can make minor changes while keeping similar beats and melodies.
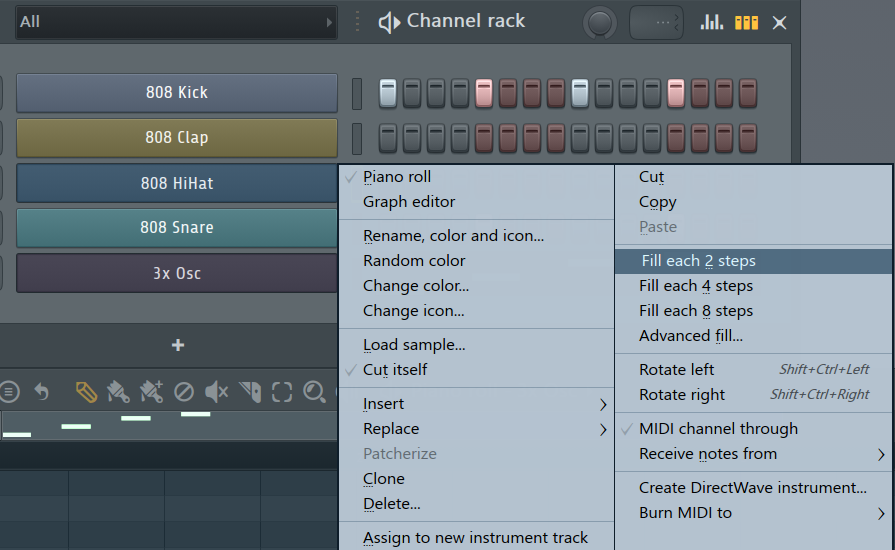 Make Changes to Pattern 2: In the Channel Rack, right-click on “808 HiHat” and select “Fill Each 2 Steps.”
Step 7: Try Out the Playlist
 Open the Playlist: In the Toolbar, click the Playlist button to show the Playlist window. This is where smaller patterns are arranged into a complete song.
- Select and Paint Patterns to the Playlist:
 Along the top of the Playlist window, click the Paintbrush tool to select it.
- In the left hand column of the Playlist, all of your Patterns are listed, click Pattern 1 to select it.
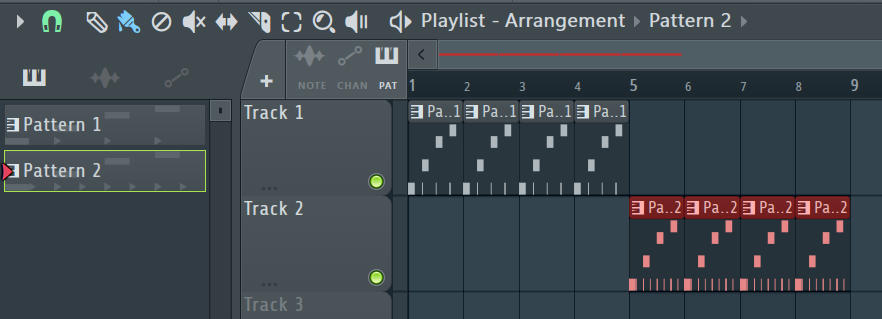
- In Track 1, “paint” the pattern in bars 1 to 4.
- Select Pattern 2, then paint it in Track 2, in bars 5 to 8, as shown above.
- In the top Toolbar, switch the Play button to “SONG” mode, then use the Play and Stop buttons to preview your arrangement. When you want to preview Patterns again, remember to switch the play button back to “PAT” mode.
- Try Deleting Patterns with Right-Click: Similar to the Piano Roll, items in the playlist can be deleted by right-clicking on them.
More info: FL Studio manual
Questions? Email help2024@echoblaster.com.